The Intention of My Blog


Welcome, my beloved readers!

In case you're wondering, it's not a typo up there for you see the definition of goodly is:

used as an adjective to describe something
1. of ample or good size, ex: a goodly amount.
2. of a fine appearance, ex: a goodly young man.
3. Archaic. of good quality, ex: a goodly gift.

I am a mother who home educates her children; I would be pleased if you'd look around. You never know if I might have something to your liking. I've blogged about different topics. I hope you enjoy your stay here. May God bless you with peace, a renewing of your mind, and rest as you read my posts.

Please remember to subscribe to my blog, using any variety of methods, which are below to the right, including Facebook.

Thanks to all for your patience as I have been on the mend. I had double heart bypass surgery in February of 2013, and I needed to focus on my recovery, which has been in steady progress. Thanks for your kind consideration.


Thanks for visiting!


Showing posts with label workbooks. Show all posts

Thursday, August 11, 2011

Sixth Grade Curriculum Choices

This is a compilation of my 6th grade choices.

I came up with what I hope will work for my incoming sixth grader in our homeschool.  I had some material already, but I knew that I needed plenty more.  I had been using the large whole curriculum work books, but I wanted to move away from those.  I felt my son needed separate workbooks, which would keep him organized.


Spectrum material, as shown below, is presented in an easy format.  These workbooks can be finished within 180 instructional days.  My son is hyper and a slow reader so these books are perfect for him.  He can do a page per day.  For the reading book, I can have him read the story on the first day and then answer the questions the next day.

Language Arts for 6th grade is from Spectrum.
Reading for 6th grade is from Spectrum.
Spelling for 6th grade is from Spectrum.
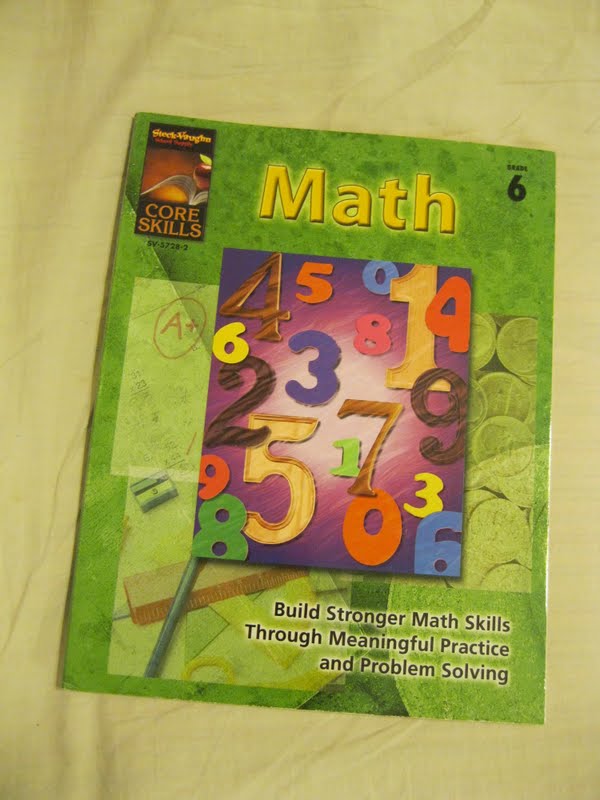
Math for 6th grade is from Steck-Vaughn.
Writing for 6th grade is from Steck-Vaughn.

Steck-Vaughn material is priceless.  It is great for those needing remedial work.  It works for those who need extra practice.  It's great for those that need the work simplified.  I think it works great for both of my sons.

Science for 6th grade is from Merrill.
History for 4-6 grades is from McGraw Hill.
Social Studies for 6-7 grades is from McGraw-Hill.

For science and social studies, I simply have checked how many pages are in each book and divided it by 180 instructional days.  Thus, my younger son will have to read about 2-4 pages per day.  If he sees something of interest for that day, he can write it down on his spiral notebook.  In this respect, you could say that I am not assigning anything specific at this point for these two subjects.  My son started reading about the presidents this summer so I will let him stay with that into his sixth grade; when he finishes that up, he can move onto the green social studies textbook.

The books I've listed above can be found online (click on the picture captions).  Over the years, I have bought some of my material online, at yard sales, book swaps at local homeschool groups, and teacher book stores.  I like actually flipping through the workbooks like I did this past weekend at Lakeshore.  I asked my son for input as he would be the one using them.

Well, thanks for reading this entry about what I'm using to homeschool my sixth grader.  I hope I've given a unique idea of what could be included for teaching sixth grade.

How about you, my readers?  For those of you who homeschool, what are you using for sixth grade?  Are you satisfied with your curriculum choices?  Are you combining some subjects?  It's perfectly fine to combine subjects. 
I pray that God helps us all, whether we are homeschooling or are thinking of homeschooling.


May God bless you all with His wisdom and peace, as you teach your children.

This has been an entry for Thorough Thursdays.  Hope you liked it.


Thursday, June 16, 2011

How to Make a Dry Erase Binder Using Workbooks

Binder that teaches about money

When I started homeschooling, I heard that teaching children through the use of wipe off books could be beneficial.  Eye-hand coordination through the use of hands on materials can help children hone their writing skills.  I could not afford and/or find these types of  books that I needed for my kids.  I decided to make the books.  Fellow homeschooling moms recommended how to make them.

I made binders for the following subjects:

ABCs,
1-10,
1-100,
Phonics,
Time,
Measurement,
Multiplication,
Calendars,
Place Value,
Geometry and Patterns,
Reading,
Science, and
Spanish


Inside of Binder with currency amounts divided with stick-it notes

This is a sample of my binders, using the concept of money.  The above picture shows how I further subdivided the topic of money.  I found worksheets from different workbooks on the topic of money.  I made sure that, under the topic of pennies, only pennies would be covered.  I did the same thing for nickels, dimes, quarters, half dollars, and then the dollar denominations.


Money workbook

It's okay to use a math workbook like the one above.  I just don't like that it thrusts a child into covering all the coins at once.  I think it should be gradual.  That's why I prefer to teach the child through a concrete manner to coincide with learning the concept of counting to one hundred.  After all, children need to count by 1's, 5's, and 10's, which will help later with multiplication.


Box of sheet protectors
Individual sheet protector

Here's how to make your own subject binder: Buy sheet protectors and cheap binders.  Get your desired workbooks and tear them up from the spine.  Then, organize the pages according to how you want to present the information to your children.  Slide the individual sheets, sometimes back to back if necessary.  Don't be afraid if you "lose" a page of a workbooks; as long as you are covering the content, it is okay to go without one or two pages.


Individual sheet slipped into sheet protector

Manipulatives for money placed in the back of binder

To solidify the learning of money concepts, manipulatives added to the binder is a perfect idea.  If the binder has no pockets or small pockets, you can use a gallon size baggie.  Punch holes into the baggie and slide into the back of the binder.  That way the manipulatives stay with the binder.  The child can take the binder to the sofa or his/her desk.


Wanted pennies to be covered first

More about pennies...

And more on pennies

The three pictures above show worksheets covering "pennies," sometimes found online, and printed them out.  It is wonderful that I have the internet to cover concepts using "free resources."  I took the time and effort to print these worksheets because I knew I could use them with all four of my kids.  Yes, I used these binders with my oldest, who is now 15.  For me, it has been worth allowing my kids to reuse these binders, saving me time and effort in the future.


Dry erase markers to fill out binder

I have bought dry erase markers, with low odor.  Also, different colors for variety help the children customize their learning.  The eye-hand coordination involved in marking the binders is helpful, especially as they are learning how to write.  That's the beauty of using the dry erase markers--a child can erase and start over again.  All four of my children have used at least some of the binders.


Ingredients to clean dry erase binder

When the binders need to be cleaned, it is easy.  Grab some wipees and baking soda (for hard to remove stains).  Once the sheet protectors are cleaned, use the paper napkins, like the ones below, or paper towels to dry them.  The binder will be ready for the next child. 


To dry the cleaned sheet protectors

Cleaned up even after four years
 
My youngest, Kaelyn, was recently ready to learn about money.  I sought out this green binder.  I opened it and found it needed cleaning.  I worried because it had not been cleaned since about four or five years ago.  When I tried the above method to clean the sheet protectors, it worked wonderfully.
 
 
Well, thanks for reading this entry and viewing these pictures.  I hope I've given you an idea for teaching money, one of the first math concepts for the elementary grades.

How about you, my readers?  How have you taught math?  Have you ever considered using wipe off books to teach early childhood learning concepts?  Your children can benefit from using a hands on method to learn.


May God bless you all with His wisdom and peace, as you teach your children.

This has been an entry for Thorough Thursdays.  Hope you liked it.

Thursday, June 2, 2011

Hands On Materials for Kindergarten

Old MacDonald manipulatives

I love using manipulatives.  In previous posts, I have mentioned hands on materials.  Teachers are taught about using items that are to be held in hand.  Tactile learners benefit from hands on materials.  Here, I have pictures of different materials I've accumulated for the kindergarten age children.


A sampling of manipulatives

Closeup of ABC Bingo game

"Opposites" and "feelings" in flashcards

Handmade flashcards in index cards

Shapes in flash cards from different sources

Baggies hold manipulatives by type and subject

Booklets and sight words taken from a workbook

Puzzles combined with flash cards teach numbers

Die with pictured coins

Closeup of money die

Manipulatives out of baggie

Wheels that teach word families

Hands on flip book for word families

Closeup of flip book

Target words of a given book

Dr. Seuss book with target words to teach

I think you'll agree with me: there are many types of manipulatives.  Hands on materials can help teach a kindergarten child.  Even though it can be time-consuming to create hands on materials, it is worth it.  If you have more than one child to teach, it is definitely worth it to make and/or accumulate these materials.  Over the years, I have also bought some of these flashcards, workbooks, and puzzles either from a store and/or other homeschool moms.

Thanks for reading this entry and viewing these pictures.  I hope it has given you some ideas for teaching Kindergarten.

How about you, my readers?  Have you every used hands on material with your children?  Do you have children who are hands on learners?  Your children can benefit from using manipulatives to learn their subjects.  Even teenagers can learn through actual lab experiments, by dissecting and combining chemicals.  It's definitely something to think about.

I hope your children have enjoyed their learning time; Kaelyn has learned by using hands on materials.

May God bless you all with His wisdom and peace.

This has been an entry for Thorough Thursdays.  Hope you liked it.

Thursday, April 21, 2011

Homeschool Organization 1: Manipulatives, Books, Teaching Material, & Environment

Kaelyn, now 6 yrs. old, is happily using her learning space.


It is one thing to consider homeschooling.  It is another to realize that clutter can develop.  How does one handle it?  Decluttering is one solution.  Organizing is another option.

It is challenging to organize the homeschool.  A homeschool has the blending of a traditional house and the learning materials.  I have been homeschooling for over 10 years.  I have accumulated a lot of books, workbooks, and hands on materials.  It is easy to think of just chucking it all; that would be the end of the clutter.

The reality is that I have children ranging from Kindergarten all the way to high school.  Any good homeschooling parent will tell you that they keep some of that stuff for the younger children.  Fortunately, I have been slowly getting rid of material as Kaelyn, the youngest, outgrows it.  I've given away countless books, workbooks, and puzzles that all my children no longer need.  No, I'm not planning to have any more children, either; that's why I've been sharing Kaelyn's stuff.


Old entertainment center holds learning material like board games and 3D shapes.


Having a background in teaching has given me an edge at homeschooling.  I learned how to teach children.  I learned how to discipline students.  I learned about teaching styles and learning styles.  I also learned how to organize teaching material.


Organize books according to theme or type.  Line up spine to edge of shelf.

I learned about the need for books, which are rich sources of information.  I worked several times in libraries before having my children.  I learned a few tricks to organize books.  I organize books by subject.  I organize books by type, whether hard back or softback.


Hardback books are separate from softback books.

Manipulatives--hands on materials I've collected.

I learned about the need for manipulatives.  They are hands on learning materials, like the ones above.  It has been fun to use colorful rhyming wheels to teach phonics.  I also had to learn how to store them properly.  That's why I decided to use Kaelyn's panda bear box to store those for her grade in her room.

Panda Bear box holds Kaelyn's kindergarten manipulatives.

White bookcase holds material by grade level.

I've learned that it is necessary to have our learning materials in an organized manner.  That helps the educator, me, pull out the necessary tools for teaching a particular lesson.  It also helps my children reach the material if they desire to learn more about a particular subject.  When the homeschooling materials are organized, learning is more efficient.  Everyone is happier in our homeschool.

I hope this blog entry has served to help with ideas on how to organize learning materials.  Whether you are a homeschooling parent or not, you can still glean some ideas on how to organize your books and other learning aids.  I hope to blog on how to organize the posters, arts and crafts, audio/visual aids, and other manipulatives in the future.

My living room houses organized bookcases and cleared sofas, as part of an inviting learning space.

I keep dining table clear where my oldest does his schoolwork.

How about you, my readers?  Are your books organized in some way?  Is your home an inviting environment, conducive to learning?  I highly suggest assessing your home to see if the children in your life have opportunities (learning tools) to find books and other materials to use.

I pray that God bless you all, my dear readers, with His wisdom and peace.

This has been an entry for Thorough Thursdays

Thursday, April 14, 2011

Organizing My Kindergartener's Home Learning Space

Kaelyn's desk and red pouches for her assignments.

In late March, I had cleaned out my children's rooms.  I had asked the girls to get rid of clothes that they had outgrown.  We had placed all the winter clothes in a plastic box.  My oldest son was ready for his own room so that meant some of the furniture and educational material would have to be shifted out of his new room.  I had to condense a few things.
Kaelyn's books are now within reach in her white bookcase.

I wanted to also make a few efficient changes for Kaelyn, my five year-old.  I had to move more educational material, like age-appropriate books, for Kaelyn into the girls' room.  I had a few challenges.  I had limited space in that room.  I had to think about putting things on walls.  I had the word wall to consider. 

I had to be frugal and shop within my own house for furniture.

There is one important fact I must confess: I stuffed the girls' dresser into their closet.  

Since the girls had less clothes, that freed up one side of the large closet.  That allowed the dresser to go in there.  I also removed a flimsy wood-colored shelf that was really for DVDs and replaced that with a white bookcase that I moved out of my bathroom.  It is white and sturdier for Kaelyn's books.  I wanted for Kaelyn to reach her books safely rather than have them fall on her.

White and light-colored furniture and accessories keep the room from looking too small.

It's better to see this lighter color.
 ...when you walk into a room than...

the objects against this wall, which are darker.

I placed Kaelyn's desk, since it is a dark color, next to the doorway so it wouldn't be the first thing you see when you walk into the room.  We already had the large bookcase that you see when you walk into the bedroom.  I saw some clutter there so I helped the older daughter remove it. We used baskets on a white wire roll away shelf.  The baskets include one for the DS game system with games and accessories; one basket has Kaelyn's puzzles; one has Iris' DVD collection; and the top one houses oldest daughter's special colors and pencils.

The blue wall has the calendar, vocabulary, and sight words.

The word wall also contains word family mini-books.

I decided to pin the blue word wall on a wall behind the door.  The word wall had been on a flimsy stand. The legs stuck out too much. This way, it takes no space at all.  Also, when the door is open, you cannot see the darkness and clutter of  Kaelyn's work.

I had to tweak Kaelyn's work containers.

I remembered that I had a red pouch organizer, which had many slots.  I had been having problems figuring out if Kaelyn had been doing her work.  I was now too far away from her to tell if she was doing her work.  Her desk had been placed in her room, too.  I already had my oldest daughter loaded with teaching Kaelyn; Iris couldn't remember to tell me when Kaelyn had finished a workbook.

This box was holding Kaelyn's work in condensed form.
Often, the folders nested too close to each other.

I pinned the red pouch next to Kaelyn's desk.  I found some neon green sticky notes.  I wrote the names of each subject.  I taped one onto each pouch.  I was then able to place each workbook and/or folder in their appropriate slot.

The red-pouched organizer allows one to see Kaelyn's subjects.  We had been working with three boxes for Kaelyn's work.  One was the plastic one for her immediate work (pictured above, which is now for the impending work).  Another one was a cardboard box for impending work and hands on material, like flashcards with sight words.  The last one was a cardboard box for work already finished and archived. 

It would often happen, with the old system, that Kaelyn would finish a workbook and then go a whole month without doing anything for a given subject.  Then, I would realize and pick up where we left off.  We had wasted precious instructional time for that subject.  Tsk!  Tsk!  


Misc., Chores, Calendar, PE, Math sections...
 and...

Science, Social Studies, Phonics/Spelling, Reading, & Language Arts.

Now, we can all see at a glance if she finishes a workbook.  She comes to me with the finished book.  I find a new one and place it in the slot for the given subject.  For example, she just finished a science workbook.  I found the manilla folder containing pre-copied worksheets.  We placed the old science workbook in the archive box and the new folder in the appropriate slot on the red pouches.  

Well, that's one segment of our spring cleaning/ reorganizing of our homeschool.  I hope I explained it well.  I am sorry that I do not have before pictures.  I was just happy to see my efforts have been paying off.  The girls' room feels more airy and purposeful now.

How about you, my readers?  If you homeschool, how do you organize your children's work areas?  Do you use cubbies, bookcases or desks?  I hope you have been rearranging whatever hasn't been working for you.  A more efficient learning environment leads to better learning.

My readers, may God bless you all with wisdom and peace as you organize your homes this spring.

This has been an entry for Thorough Thursdays.  I hope you enjoyed it.

Pocket chart organizers: (manipulatives can also be found at these websites)

Really Good Stuff website
 

LinkWithin

Related Posts Plugin for WordPress, Blogger...