The Intention of My Blog


Welcome, my beloved readers!

In case you're wondering, it's not a typo up there for you see the definition of goodly is:

used as an adjective to describe something
1. of ample or good size, ex: a goodly amount.
2. of a fine appearance, ex: a goodly young man.
3. Archaic. of good quality, ex: a goodly gift.

I am a mother who home educates her children; I would be pleased if you'd look around. You never know if I might have something to your liking. I've blogged about different topics. I hope you enjoy your stay here. May God bless you with peace, a renewing of your mind, and rest as you read my posts.

Please remember to subscribe to my blog, using any variety of methods, which are below to the right, including Facebook.

Thanks to all for your patience as I have been on the mend. I had double heart bypass surgery in February of 2013, and I needed to focus on my recovery, which has been in steady progress. Thanks for your kind consideration.


Thanks for visiting!


Showing posts with label cinder blocks. Show all posts

Wednesday, June 27, 2012

Our Outdoor Sink On Cinder Blocks

This is my outdoor sink.

First off, I must apologize for not blogging any time sooner.  I have not wanted to keep repeating myself, especially about my diet and weight loss efforts, which, by the way, have stalled; however,  I think I've got a cool subject to cover.

As you can see, I now have an outdoor sink.  

I've been wanting this set up for quite a while, and my hubby did it this past weekend.  I should give some background about this project, though.  My hubby's friend was updating a house rental, and my hubby stopped at a yard sale and bought a used, stainless steel double sink that the friend could use.  We had lived in that rental for a few months, and I remembered the old, white single sink with the built-in counter on both sides.  I knew how I could incorporate it into my outdoor area so...

my hubby and his friend did an exchange.  

Yes!


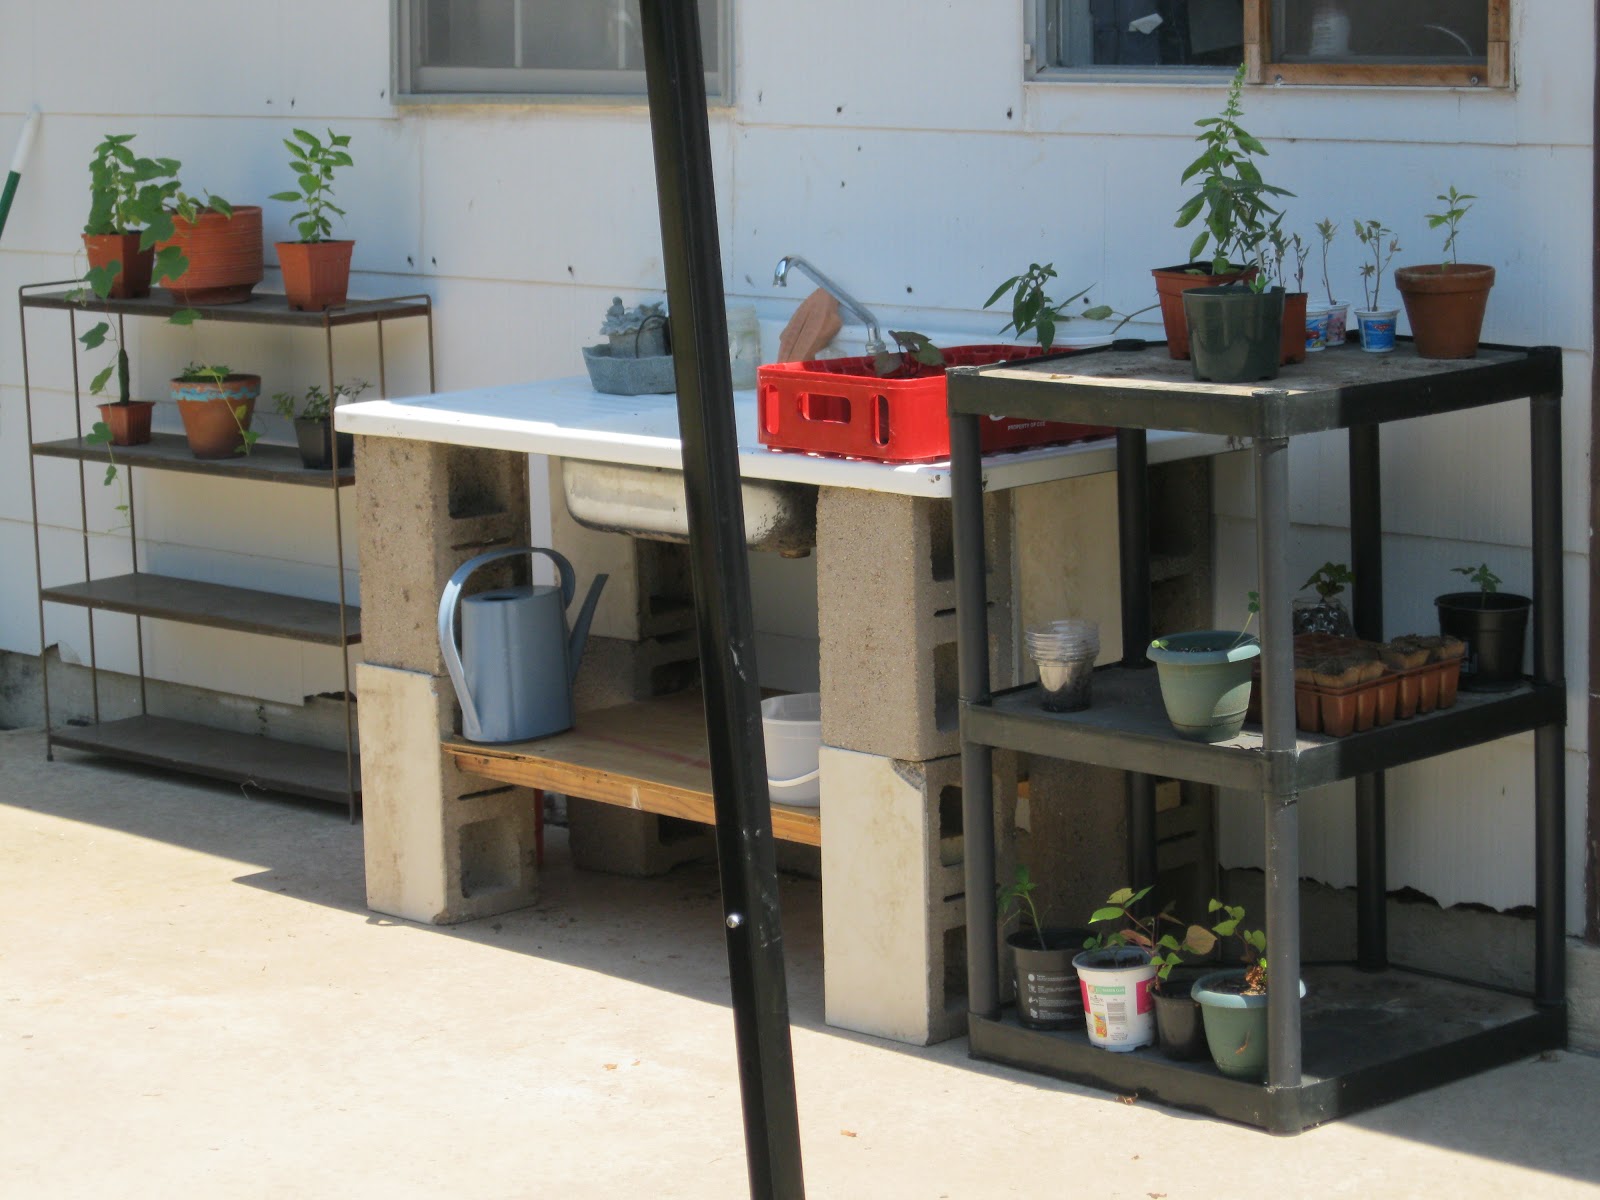
This is a side view of the sink standing on 8 upright cinder blocks.

With this sink, wash up will be easier after gardening.

I asked my hubby to install a shelf underneath the sink.  If you look carefully, you will notice that there are two horizontal, parallel 2 X 4's holding up a piece of plywood.  I wanted to have a space to hold watering cans, pots, and soil.  It's still a work in progress to move things out of my sauna-like metal storage, but the sink setup has very promising storage of its own. 


This is the underside of my outdoor sink.

I wanted to show the underside of the sink.  My hubby found old, plastic pipes, including elbows to direct the dirty water into a container, which is located to the left.


This is a closeup of the left side of my outdoor sink.

The dirty water drains out into a 5 gallon Home Depot bucket.  I will reuse the dirty water to hydrate my parched plants.


My outdoor sink faucet was hooked up to the outdoor faucet.

The special feature to the sink is that my hubby installed a metal, flexible hose so that water can come out of the faucet above the sink.

I knew that it was possible to have a sink outdoors!

I had faith that my hubby could put it together.  All it took was some imagination to dream the possible.  This idea was inspired by a picture I saw on Facebook about a couch made out of cinder blocks.  I believe it was from an article in the Better Homes and Gardens website.  I think someone had pinned it on a board at Pinterest.com.


Well, thanks for reading about our outdoor sink.  I hope it has inspired you to create your own cinder block projects.  

How about you, my readers?  Have you created anything special with cinder blocks or other such sturdy material for your oudoor areas?

This blog entry will be placed under Family Fun Fridays.


Sunday, April 17, 2011

Gardening Vegetables and Fruit

Bell pepper and tomato plants needed replanting.

We had a busy day.  I usually like to post as early as possible, but I wanted to blog about our garden which was not ready.  Days ago, my hubby had placed cinder blocks in the shape of a rectangle in the area that we had chosen.  We had even put some garden soil inside the rectangle yesterday.  We just needed a few bags of extra ingredients to finish it up.

Before: Garden soil was bought at Keller Material.

In the afternoon, we went to Home Depot to buy 3 bags of  cow manure, 2 large bags of Miracle Gro organic garden mix, and 1 large bag of cedar mulch.  I also thought to buy 3 pairs of neon green gardening gloves for the three older kids.  Kaelyn had small red gloves. The lonely plant is sage that lived on from last year's planting.  The plant survived freezing and hot temperatures!


Cow manure mixed in the garden soil.

Miracle Gro mixed in the soil.


The kids and hubby mixed in the cow manure and Miracle Gro.  They used rakes and shovels.  I asked them to put on their gloves.  (I don't like the idea of the kids touching manure with their bare hands.)  Then, it was time to plant the bell pepper and tomato plants.

I tapped those baby plants out of their small container.
I estimated where I wanted the plants.  They have to be about a foot apart.  I used empty pots to plot the locations.  I pushed the pots into the ground to "stencil" where the plants were to go.  The kids then dug the hole in those spots.

I placed each baby plant in the hole and the kids did the rest.

I turned the plants upside down and tapped hard at the bottom of the small containers to tease them out.  I placed each plant in the holes that the kids made.  The kids then buried the plant.  We've been through this before so they know to tamp down the soil.  After that, came the mulch.


Cedar mulch keeps the moisture from evaporating.

The kids, hubby, and I mulched the plants.  I asked the kids to first surround the plants.  We started with handfuls of mulch.  Hubby shoveled mulch into the garden bed.  Then, he dumped the remainder of the bag.  We finished by spreading the mulch with shovels and rakes.

After: Mulch surrounds the tomato and bell pepper plants.  
The last ingredient was the water.  Thirsty plants require water.  Water makes the tomatoes plump.  With mulch, you don't have to worry about the plants going too dry in the heat.  We need to mulch for the Texas heat.

Hubby watered the plants. 

  
We made sure to put our tools and gloves away.  It's important to teach the kids to put away the shovels and rakes.  It's not enough to teach them how to garden.  Little details like that can help to know where the tools are next time.  We will be using the tools again for another vegetable garden.   


Gloves go into a hanging shoe organizer.

I'm so proud of my kids and hubby.

Lastly, we had a little treat because the kids did such a good job.  I had bought some badminton gear.  We played until we got tuckered out.  Not even the darkness could dissuade us from playing.  We enjoyed our family time together.

Badminton gear--some I bought today, as a special treat.

Well, I hope you liked this blog entry.  I wanted to show how easy it is as a family to garden.  Gardening is good for your health because of the good foods you get out of it.  You exercise and get to shop in your own backyard.  Later, I hope to show how to tend and harvest the garden.

How about you, my dear readers?  Do you like gardening?  Are you gardening?  If so, what?    I would highly encourage those who haven't to start small.  Container gardening is possible for those with limited space.

God bless you all with His peace and wisdom, my beloveds.

This has been a Saturday Spreads entry.


LinkWithin

Related Posts Plugin for WordPress, Blogger...